What to Expect from a Professional Radon Fan Installation
When you finally get that radon test result back and see a number above the EPA action level, the next step can feel overwhelming. You know you need a mitigation system, but the details of how it actually works, especially the radon fan installation, can seem mysterious. I have been in basements and crawlspaces across York County for over a decade, and I can tell you that a proper setup is more about good judgment and solid fundamentals than it is about fancy equipment. Let me walk you through what a professional radon fan installation looks like, what choices you face, and why the little details matter more than you might think.
How a Sub-Slab Depressurization System Works
The most common and effective approach in our area is sub-slab depressurization. The idea is simple: you create a low-pressure zone under the concrete slab so that soil gas, the air that carries radon up from the ground, gets pulled into a pipe instead of seeping through cracks in your foundation. That pipe runs up and out of the house, with a radon mitigation fan installed somewhere along the line to keep the air moving. The fan runs continuously, 24/7, and it is the heart of the whole system.
In a typical York County home with a cinder block foundation, we look at the floor plan, the type of flooring, and the location of the water main or any French drain that might interfere. We drill a small hole through the slab, dig out a radon suction pit below it, and insert a section of PVC pipe. That pipe connects to the fan, and the fan discharges above the roofline.
Choosing the Right Radon Mitigation Fan
Not all fans are the same. You will hear names like SUPCO or RAD-40 when you start researching, and those are reliable workhorses. But the choice depends on the size of your home, the soil conditions, and how long the pipe run is. A fan that is too powerful can actually pull too hard and create a vacuum that draws in moisture or makes the system noisy. One that is too weak might not lower your radon levels enough.
I have seen homeowners try to save money by buying a cheap inline bathroom fan and rigging it up. That almost never works well. A dedicated radon mitigation fan is built to run for years with minimal maintenance. It handles the moisture and the continuous load. The cost difference is small compared to the peace of mind you get from a system that actually does its job.
Step-by-Step: What the Radon Fan Installation Looks Like
When my crew arrives for a radon fan installation, we start by confirming the test results and walking the property. We look at the crawlspace or basement, check for any standing water, and note where the electrical outlets are. Then we mark the spot for the suction pit. We use a core drill to make a clean hole through the slab. That keeps dust down and gives a tight seal around the PVC pipe.
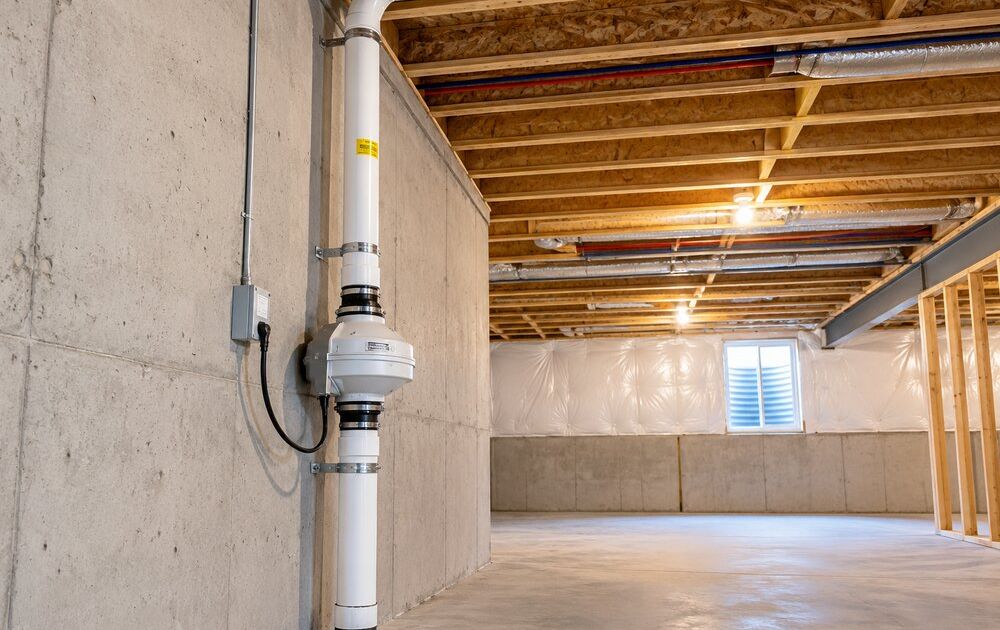
After the hole is drilled, we dig out a small pit below the slab, about the size of a large bucket. This radon suction pit gives the air a place to collect before it enters the pipe. We fill around the pipe with gravel or a special sand, then seal the top of the hole with a non-shrinking hydraulic cement. That seal is critical. If it cracks, you lose the vacuum and the system does not work.
Next we run the PVC pipe from the suction pit to the location where the fan will go. In many York County homes, that means going up through a closet or an attached garage and out through the roof or a side wall. We use a combination of couplings and primer-cement joints. Every joint must be airtight. A small leak can let soil gas escape into the living space.
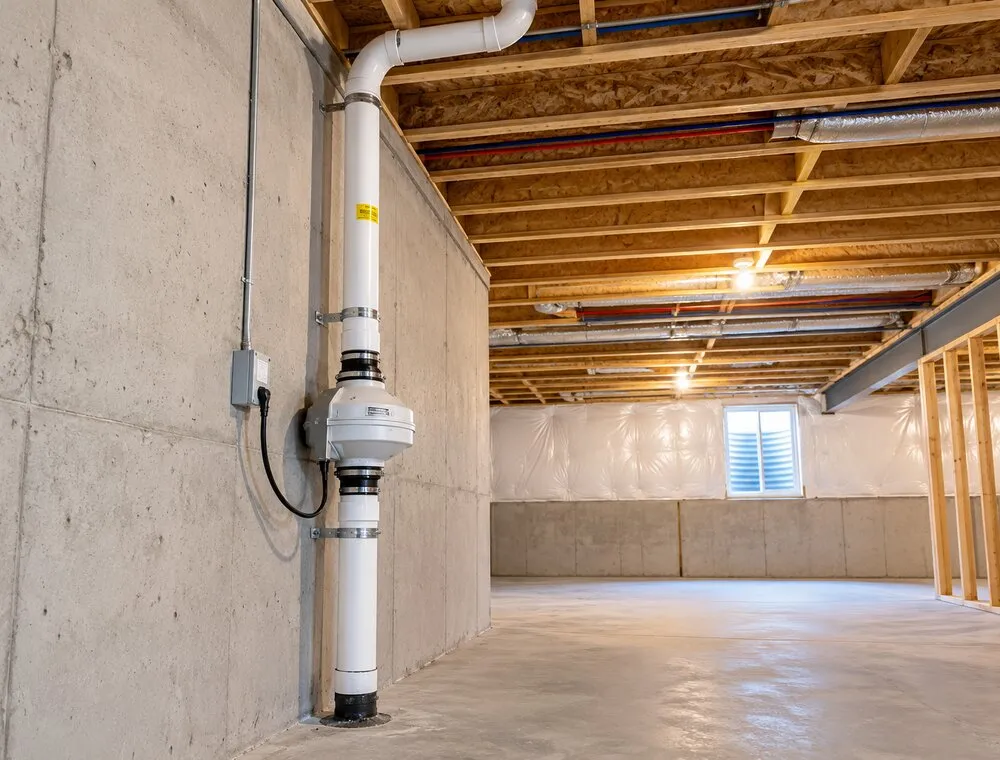
The actual radon fan installation happens after the pipe is in place. We mount the fan securely, usually on an exterior wall or in the attic, and connect it to the pipe. We wire it to a dedicated circuit with a clearly labeled switch, though you never want to turn the fan off. Then we seal the point where the pipe passes through the wall or roof with flashing to keep water out.
Monitoring the System with a Manometer
Once the fan is running, we install a U-tube manometer on the pipe, usually near the fan or in the basement. That little device, a clear tube with colored fluid, tells you whether the system is pulling a vacuum. A properly working system will show a difference in the fluid levels, typically a half-inch to an inch of water column. I tell homeowners to check the manometer every few months. If the fluid levels equalize, something is wrong, maybe a leak or a fan failure.
A manometer is cheap insurance. You do not need to be a technician to read it. If you see the fluid flat, call your mitigation company. They can troubleshoot without you having to guess. I have seen systems run for years without a hitch simply because a homeowner glanced at the manometer once a season.
Testing After Installation
No radon fan installation is complete until you do a post-mitigation test. The EPA and the National Radon Program both recommend waiting at least 24 hours after the system is turned on, then running a short-term test for 48 hours. In our area, we often use a summa canister or a continuous monitor for the follow-up. But many people use an activated carbon test kit, something like a charcoal canister that absorbs radon over a few days.
The goal is to get below the EPA action level of 4 picocuries per liter. Most well-designed systems in York County can bring levels down to 1 or 2. If the post-mitigation test shows a higher number, we check the system, look for leaks, and sometimes adjust the fan speed or add a second suction point.
Warranty and Maintenance
A good mitigation system warranty covers the fan and the workmanship for at least five years. Some manufacturers offer longer terms. I always tell people to read the fine print. The warranty usually covers a replacement fan if the motor fails, but it might not cover damage from lightning or improper electrical work.
Maintenance is minimal. Check the manometer periodically. Make sure the exhaust point outside is clear of leaves, snow, or bird nests. If you have a crawlspace, check that the pipe has not been knocked loose by pests or settling. That is about it. The fan itself is designed to run continuously for years with no upkeep.
Common Pitfalls and Trade-Offs
One issue I see in older York County homes is a cinder block foundation that has not been sealed properly. The blocks themselves can wick moisture and allow soil gas to enter through the walls. Sub-slab depressurization still works, but you might need to seal the top of the block wall with a masonry coating. I have also seen French drains that run too close to the suction pit, pulling water into the system. In those cases, we relocate the pit or install a water trap.
Another trade-off is noise. A radon mitigation fan can be audible, especially if it is mounted near a bedroom or a living area. Some fans are quieter than others. SUPCO makes a model called the RP series that is relatively quiet. But if noise is a concern, remote mounting in a garage or an attic can help. The extra pipe run might slightly reduce the vacuum, but the trade-off is worth it for many homeowners.
I have also seen systems where the radon fan installation was done by someone who did not understand the importance of a good seal around the pipe penetration. They used standard caulk instead of flashing and foam. That might hold for a season, but then water gets in and the seal fails. A little extra effort on the penetration details saves a lot of grief later.
Final Thoughts
A radon fan installation is not a weekend DIY project for most people. It involves drilling through concrete, running pipe, wiring electricity, and sealing penetrations. But it is also not rocket science. A competent contractor with experience in York County homes can do it in a day. The key is to get a post-mitigation test, check the manometer from time to time, and know what your warranty covers. If you take those steps, you can trust that your family is breathing cleaner air. And that is worth the effort.